Hot & Cold
Same processes, similar substances, different effects!
Reagents
Safety
- Put on protective gloves and eyewear.
- Conduct the experiment on the safety underlay.
- Do not allow chemicals to come into contact with the eyes or mouth.
- Keep young children, animals and those not wearing eye protection away from the experimental area.
- Store this experimental set out of reach of children under 12 years of age.
- Clean all equipment after use.
- Make sure that all containers are fully closed and properly stored after use.
- Ensure that all empty containers are disposed of properly.
- Do not use any equipment which has not been supplied with the set or recommended in the instructions for use.
- Do not replace foodstuffs in original container. Dispose of immediately.
- In case of eye contact: Wash out eye with plenty of water, holding eye open if necessary. Seek immediate medical advice.
- If swallowed: Wash out mouth with water, drink some fresh water. Do not induce vomiting. Seek immediate medical advice.
- In case of inhalation: Remove person to fresh air.
- In case of skin contact and burns: Wash affected area with plenty of water for at least 10 minutes.
- In case of doubt, seek medical advice without delay. Take the chemical and its container with you.
- In case of injury always seek medical advice.
- The incorrect use of chemicals can cause injury and damage to health. Only carry out those experiments which are listed in the instructions.
- This experimental set is for use only by children over 12 years.
- Because children’s abilities vary so much, even within age groups, supervising adults should exercise discretion as to which experiments are suitable and safe for them. The instructions should enable supervisors to assess any experiment to establish its suitability for a particular child.
- The supervising adult should discuss the warnings and safety information with the child or children before commencing the experiments. Particular attention should be paid to the safe handling of acids, alkalis and flammable liquids.
- The area surrounding the experiment should be kept clear of any obstructions and away from the storage of food. It should be well lit and ventilated and close to a water supply. A solid table with a heat resistant top should be provided
- Substances in non-reclosable packaging should be used up (completely) during the course of one experiment, i.e. after opening the package.
FAQ and troubleshooting
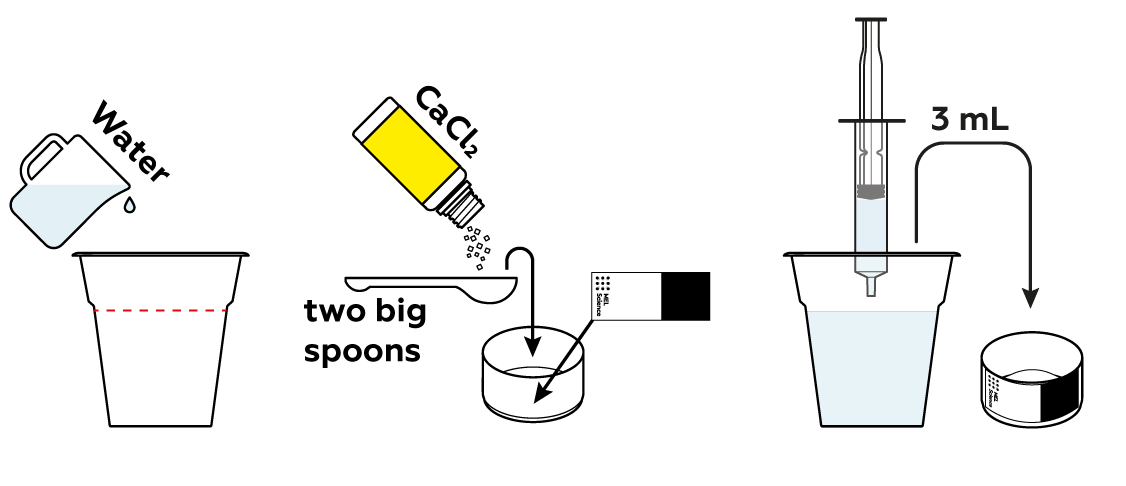
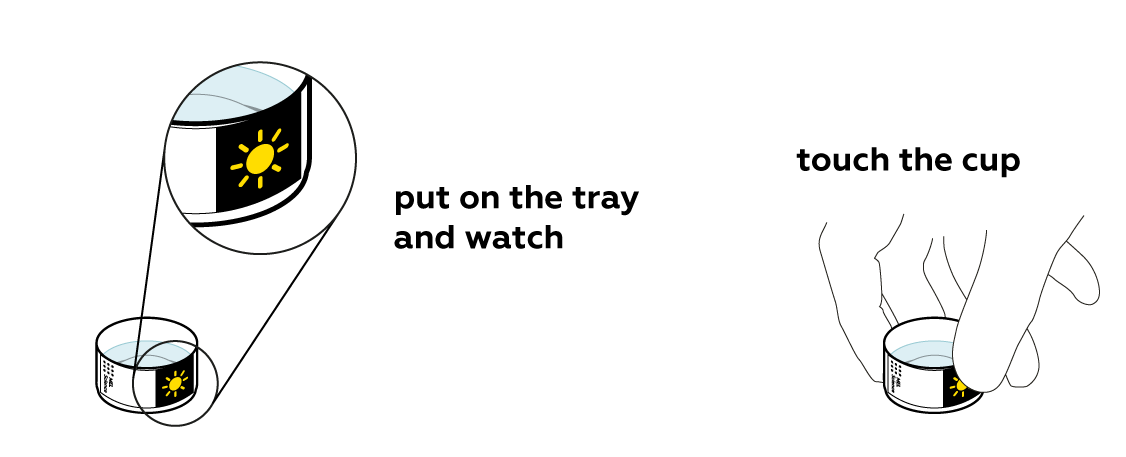
Firstly, make sure to use room-temperature water. If the water you added to the calcium chloride was too cold, then no matter how hard it tries, the calcium chloride won’t be able to heat the water enough to make the sticker change colors. Conversely, urea, which cools water as it dissolves, will not be able to cool it sufficiently if the water is initially too hot. So, for fairness’ sake, add room-temperature water to both cups and watch how differently similar substances behave!
It is also important to place the sticker closer to the bottom of the cup – as close as possible to the temperature-changing liquid.
Make sure to add exactly as much water as shown in the instructions. If you fill the whole cup with water, it won't work. The same is true for the quantities of reagents.
Don’t worry! Use this chance to determine which substance will win the “thermo-battle”! Just add water and see which of two symbols appears on the thermosticker. Then repeat the experiment, this time using separate cups.
Step-by-step instructions
CaCl2 crystals consist of Ca2+ and Cl- particles neatly bound together, but they are quite happy to break apart and venture into the water. It takes some heat energy to break the bonds between the particles in the crystal.

If some heat is taken away, you'd expect the solution to cool down, right? But the solution heated up dramatically! How come? As it turns out, Ca2+ and Cl- particles form new bonds with water molecules, and these bonds are stronger than the bonds in the CaCl2 crystals. As the new bonds with water form, more heat is released than it took to break them apart!

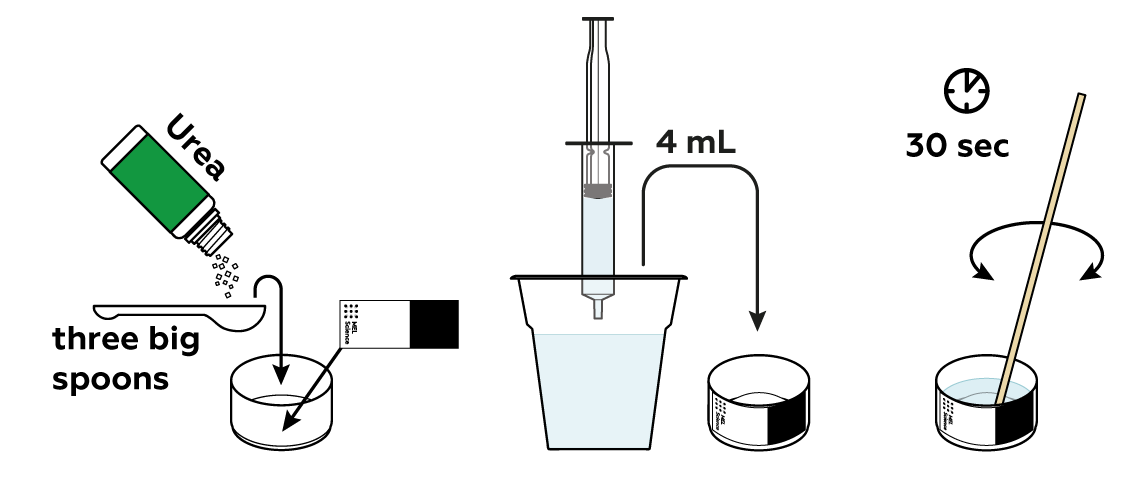
Now try and dissolve some urea crystals. This is essentially the same process. Will this solution heat up too?

The solution cooled down! And you can probably guess why. The formation of bonds between the urea molecules and water produced much less heat than it took to break the crystal. Thus, the total amount of heat was reduced, i.e., the solution cooled down.

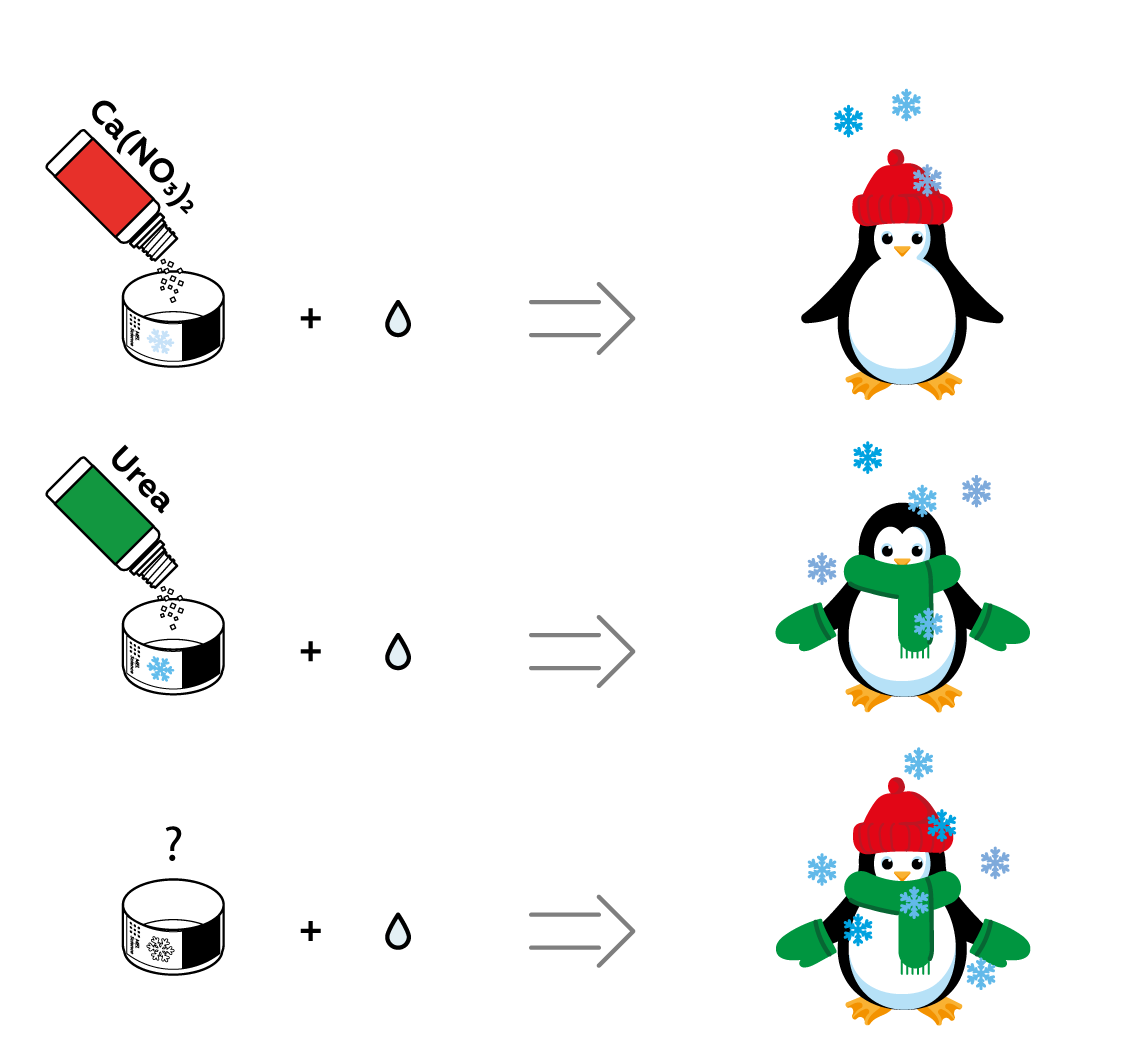
The more urea you dissolve, the colder the solution will become. But you can only dissolve so much of a substance in a given amount of water. Luckily, you can dissolve more than one substance in the same water! Both urea and Ca(NO3)2 cool the solution down. See if they can join forces!

Disposal
- Please refer to local regulations when disposing of chemicals.
- Dispose of other solid waste with household garbage.
- Pour leftover solutions down the sink. Wash with an excess of water.
Scientific description
What are endothermic and exothermic processes?
Сhemical processes, such as reactions and dissolution, can release or absorb heat. Processes that release heat are said to be exothermic, while processes that absorb heat are said to be endothermic.
You may have already guessed that you observed both of these processes in this experiment: the dissolution of calcium chloride CaCl2 is an exothermic process, as it involves the release of heat, while the dissolution of urea is an endothermic process: the cup gets cold, which means that the urea has taken heat from its surroundings in order to dissolve in the water.
You can observe one more exothermic process in the “Thermal effects” set – the “Crumpled bottle” experiment demonstrates how surprisingly hot a reaction can get!