Cyanotype
Create an image using light!
Reagents
Safety
- Conduct the experiment on the safety underlay.
- Put on protective gloves and eyewear.
- Do not allow chemicals to come into contact with the eyes or mouth.
- Keep young children, animals and those not wearing eye protection away from the experimental area.
- Store this experimental set out of reach of children under 12 years of age.
- Clean all equipment after use.
- Make sure that all containers are fully closed and properly stored after use.
- Ensure that all empty containers are disposed of properly.
- Do not use any equipment which has not been supplied with the set or recommended in the instructions for use.
- Do not replace foodstuffs in original container. Dispose of immediately.
- In case of eye contact: Wash out eye with plenty of water, holding eye open if necessary. Seek immediate medical advice.
- If swallowed: Wash out mouth with water, drink some fresh water. Do not induce vomiting. Seek immediate medical advice.
- In case of inhalation: Remove person to fresh air.
- In case of skin contact and burns: Wash affected area with plenty of water for at least 10 minutes.
- In case of doubt, seek medical advice without delay. Take the chemical and its container with you.
- In case of injury always seek medical advice.
- The incorrect use of chemicals can cause injury and damage to health. Only carry out those experiments which are listed in the instructions.
- This experimental set is for use only by children over 12 years.
- Because children’s abilities vary so much, even within age groups, supervising adults should exercise discretion as to which experiments are suitable and safe for them. The instructions should enable supervisors to assess any experiment to establish its suitability for a particular child.
- The supervising adult should discuss the warnings and safety information with the child or children before commencing the experiments. Particular attention should be paid to the safe handling of acids, alkalis and flammable liquids.
- The area surrounding the experiment should be kept clear of any obstructions and away from the storage of food. It should be well lit and ventilated and close to a water supply. A solid table with a heat resistant top should be provided
- Substances in non-reclosable packaging should be used up (completely) during the course of one experiment, i.e. after opening the package.
FAQ and troubleshooting
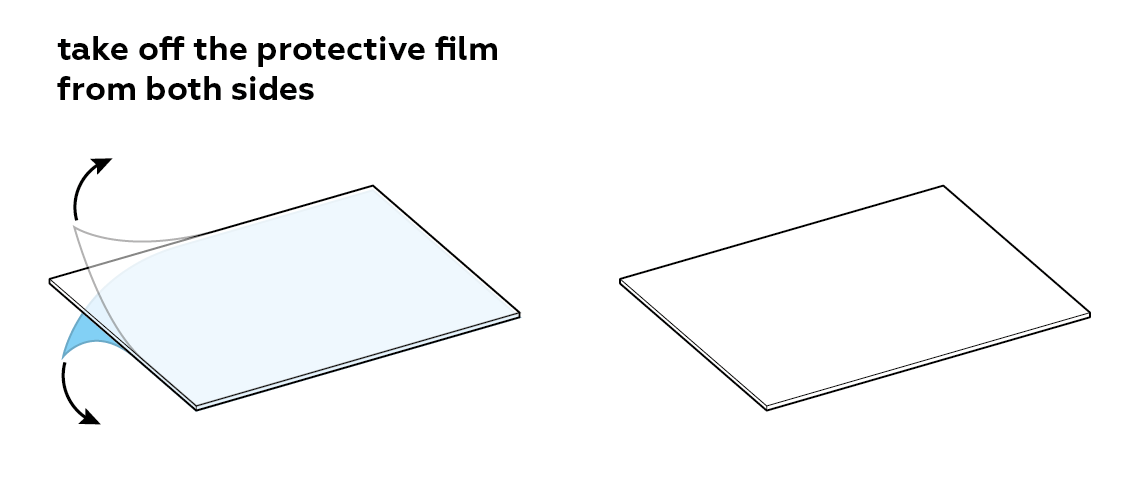
The protective film covering the plexiglass plate is tinted blue. When the protective film is removed, the plexiglass will appear colorless. Try to remove the film starting from one of the corners. You can always ask an adult for help!
Yes, that's totally normal. The reaction yields carbon dioxide CO2, which you can observe as bubbles.
If the whole mixture has turned blue, this likely means that you’ve overexposed it to light. But don’t worry! Just discard this plastic cup and start over. When repeating the experiment, keep in mind that the experiment must be performed in very dim lighting.
And if the mixture turned greenish? It will still work, but the image won’t be as contrasted.
Unfortunately, ordinary paper is rather thin and tears relatively easily. We recommend using the watercolor paper provided in the set. The set contains enough paper to repeat the experiment several times.
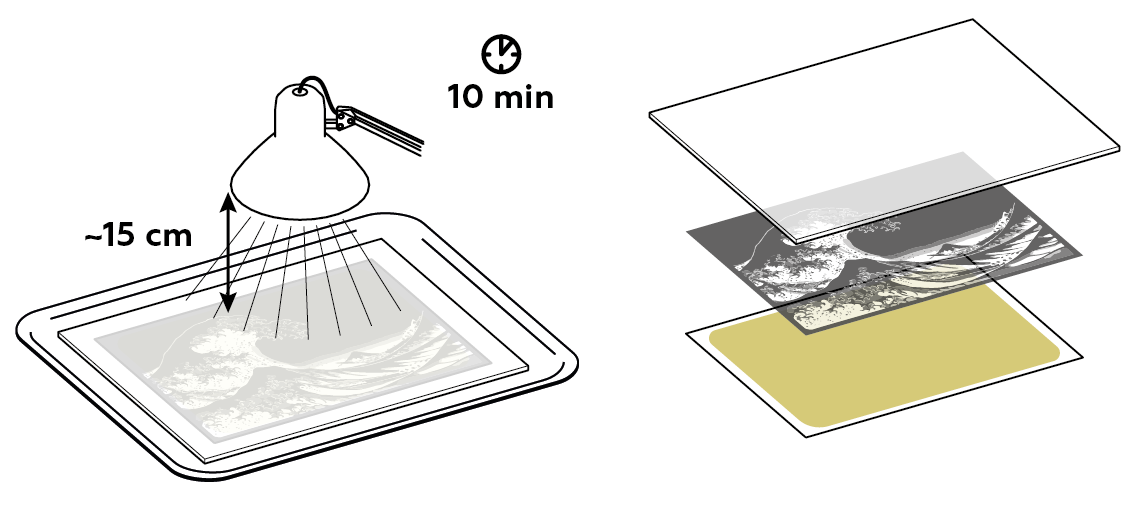
For this experiment, you can use a 75 W incandescent light (including halogen) or an 11 W LED or fluorescent light. Your light source should be positioned approximately 15 cm (6 in) away from the paper. Leave the paper exposed to light for 10–15 min. If your light source is more powerful than the references listed above, keep it farther away from the paper.
Don't worry – just continue the experiment. Complete the next steps and observe the result!
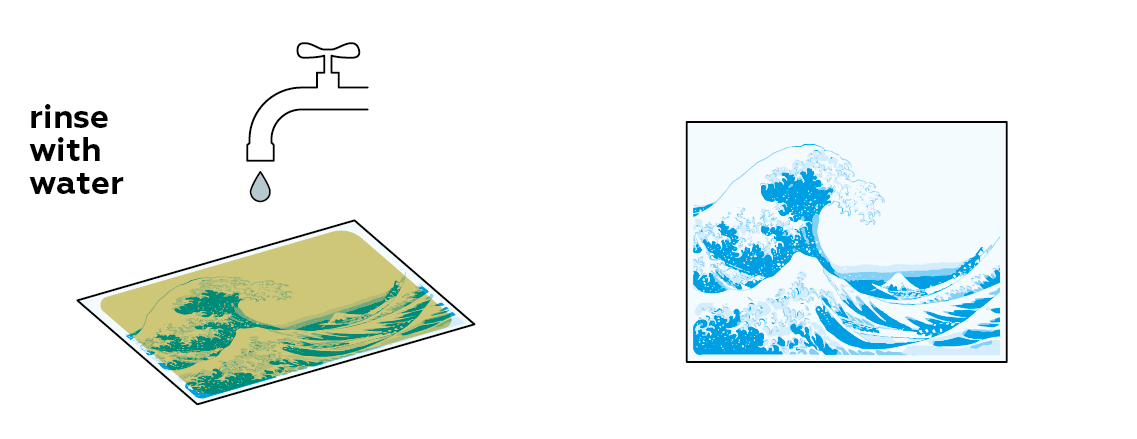
The longer you rinse, the clearer the image will be. Just don't scrape it too much!
Step-by-step instructions
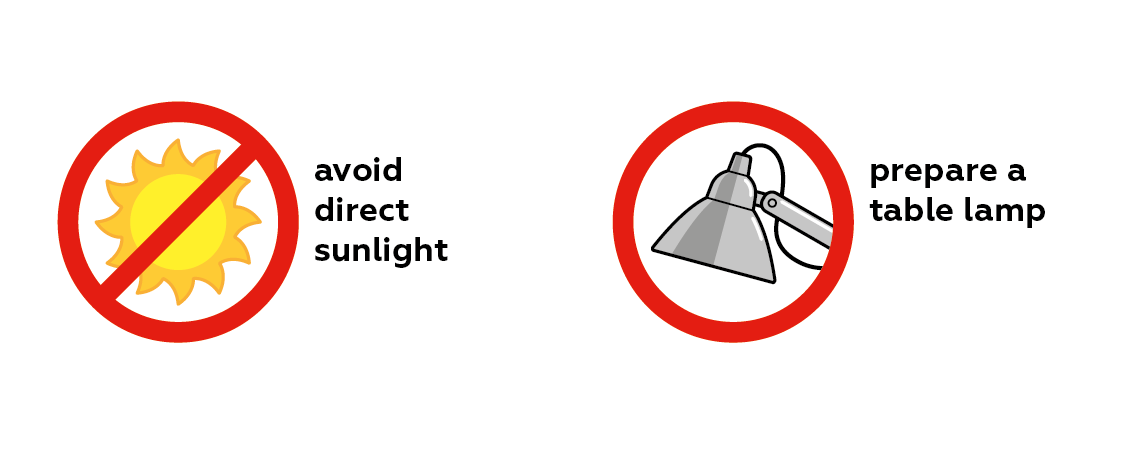
You will be dealing with light-sensitive reagents, so you'll need to avoid bright light, such as direct sunlight and strong overhead lighting.
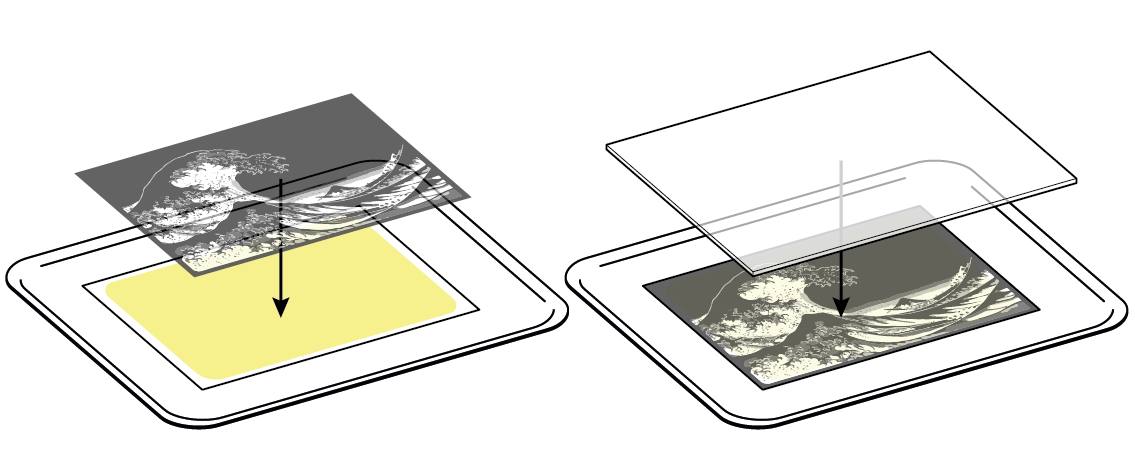
Prepare the plexiglass plate.
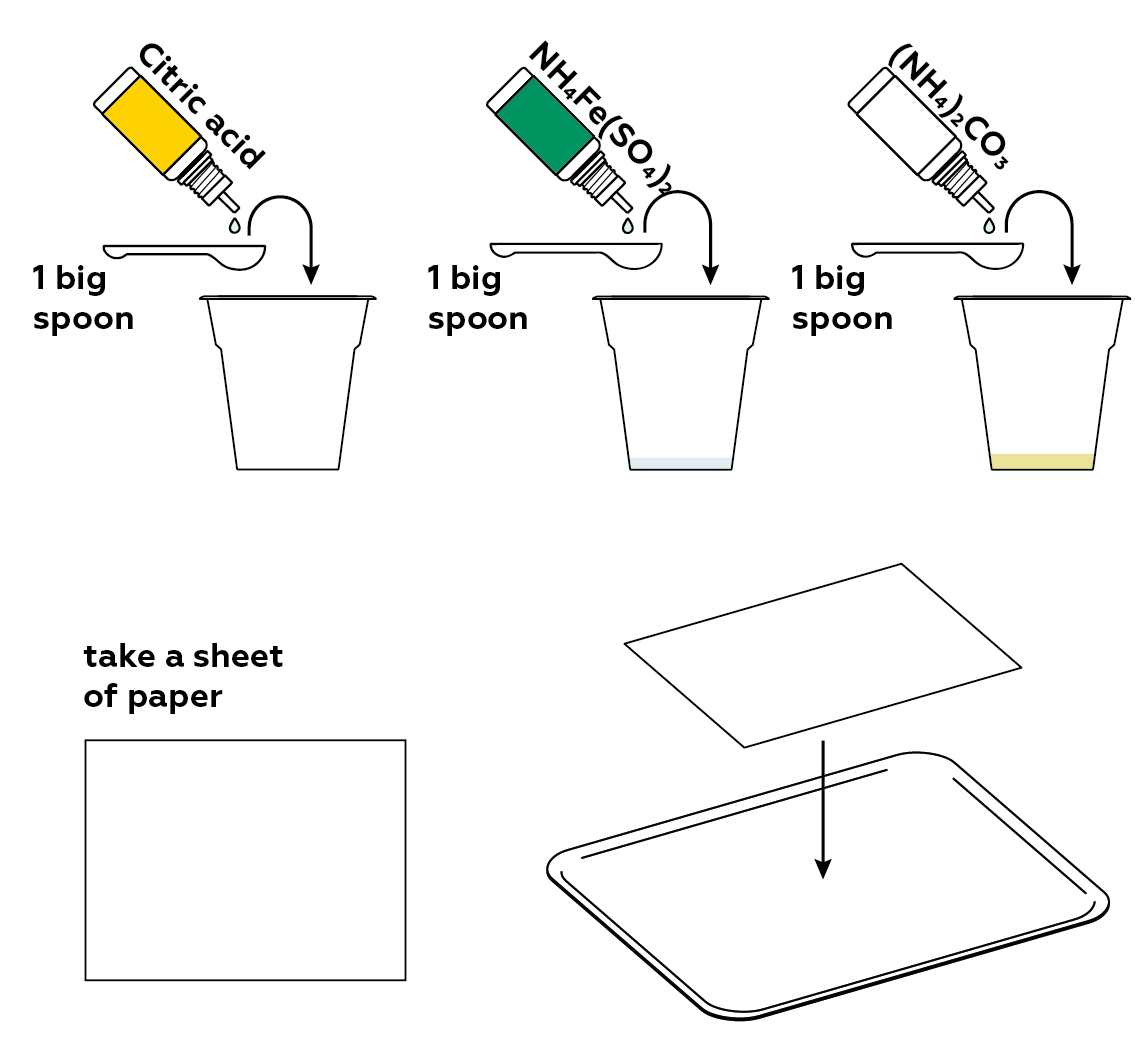
Now, you’ll need a light-sensitive compound. Ammonium iron(III) citrate is one such compound. To make it, mix ammonium iron(III) sulfate, citric acid, and ammonium carbonate. Get a sheet of paper ready!
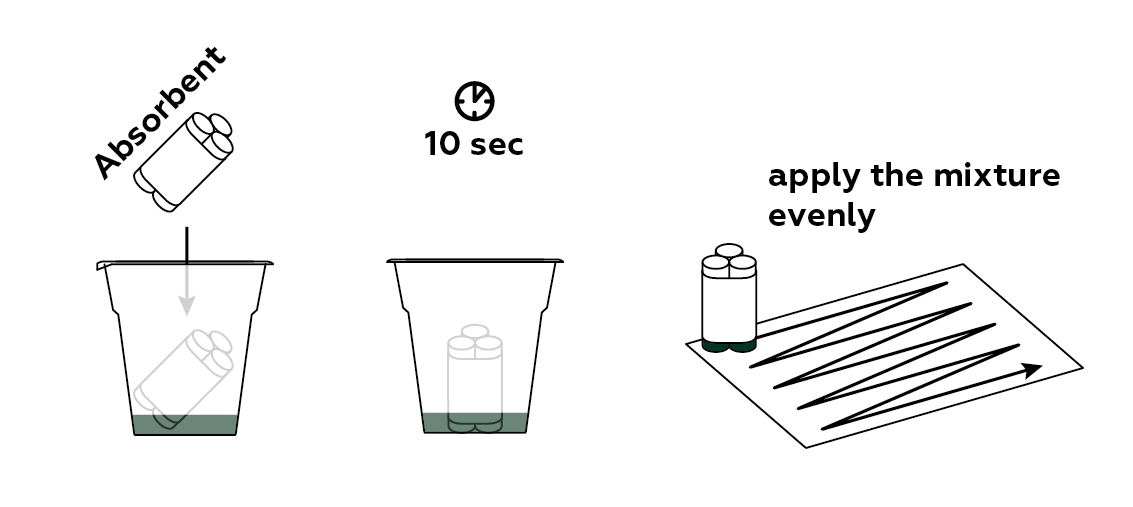
Apply your light-sensitive compound to the sheet of paper.
To create an actual image, protect some areas of the paper using a transparent film with a negative image.
When exposed to light, the iron ions in ammonium iron(III) citrate are reduced to iron(II) ions. However, the result of this reaction is not visible on its own.
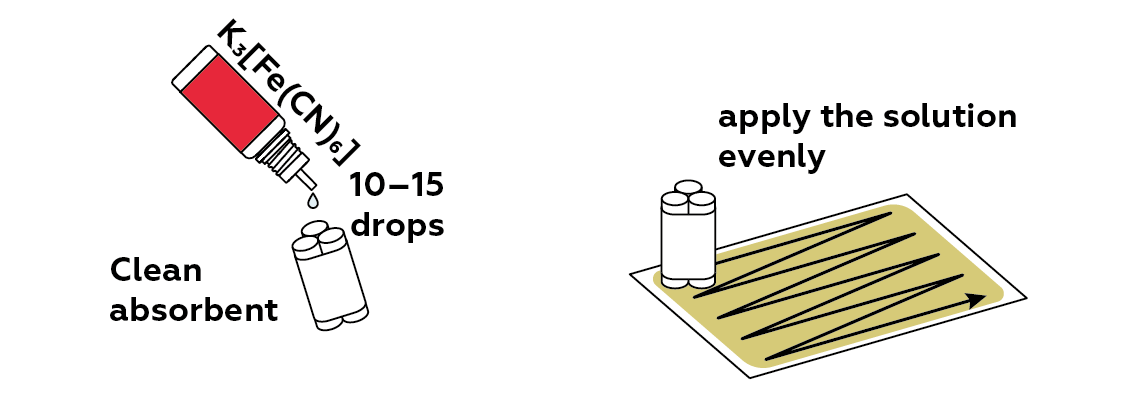
Apply some potassium hexacyanoferrate(III) to the paper. When it meets the iron(II) ions, it will form a vividly-colored compound called "Prussian blue", which will make the image visible.
In order to preserve your image, you need to remove any unreacted light-sensitive mixture from the paper.
Disposal
Please refer to local regulations when disposing of chemicals. Dispose of other solid waste with household garbage. Pour leftover solutions down the sink. Wash with an excess of water.
Scientific description

That’s interesting!
Cyanotyping was historically used in some industrial fields to create what are known as blueprints. The term ‘blueprint’ usually refers to engineering-specific technical drawings. Blueprints were mostly used in the 19th and 20th centuries to copy technical drawings of buildings and ships. However, with the advent of industrial printers, this method gradually lost popularity, and now is most often used by hobbyists.
The method’s “blue” name is indeed due to the fact that the result is blue. Later, another method was developed, which differs mostly in the resulting color – the images it produces range from pinkish to pure white. Such a picture is known as a whiteprint. The reagents that contribute to this process differ vastly from those used to create a blueprint, the key substances being organic compounds containing diazo compounds.