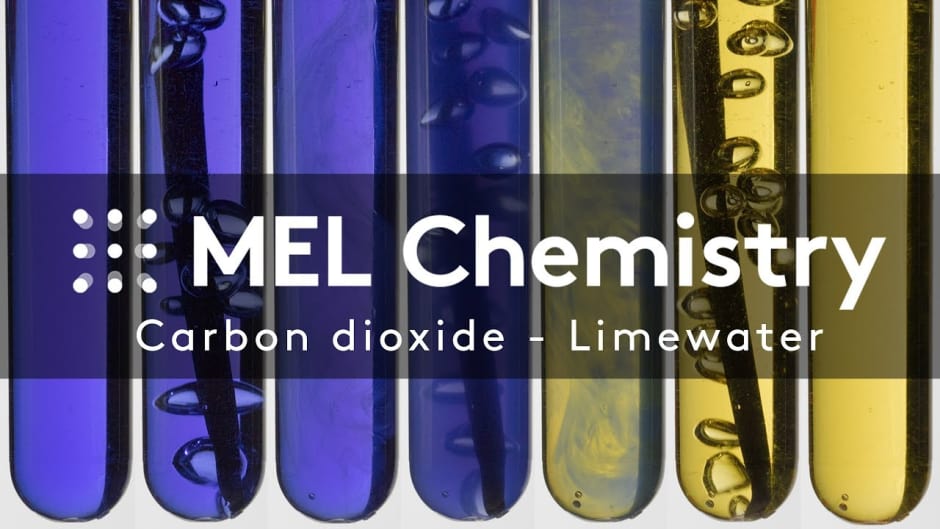
Limewater
Turn water into "milk" and back again!
Reagents
Safety
- Put on protective gloves and eyewear.
- Conduct the experiment on the plastic tray.
- In step 3 use tube only to breath out!
- Do not allow chemicals to come into contact with the eyes or mouth.
- Keep young children, animals and those not wearing eye protection away from the experimental area.
- Store this experimental set out of reach of children under 12 years of age.
- Clean all equipment after use.
- Make sure that all containers are fully closed and properly stored after use.
- Ensure that all empty containers are disposed of properly.
- Do not use any equipment which has not been supplied with the set or recommended in the instructions for use.
- Do not replace foodstuffs in original container. Dispose of immediately.
- In case of eye contact: Wash out eye with plenty of water, holding eye open if necessary. Seek immediate medical advice.
- If swallowed: Wash out mouth with water, drink some fresh water. Do not induce vomiting. Seek immediate medical advice.
- In case of inhalation: Remove person to fresh air.
- In case of skin contact and burns: Wash affected area with plenty of water for at least 10 minutes.
- In case of doubt, seek medical advice without delay. Take the chemical and its container with you.
- In case of injury always seek medical advice.
- The incorrect use of chemicals can cause injury and damage to health. Only carry out those experiments which are listed in the instructions.
- This experimental set is for use only by children over 12 years.
- Because children’s abilities vary so much, even within age groups, supervising adults should exercise discretion as to which experiments are suitable and safe for them. The instructions should enable supervisors to assess any experiment to establish its suitability for a particular child.
- The supervising adult should discuss the warnings and safety information with the child or children before commencing the experiments. Particular attention should be paid to the safe handling of acids, alkalis and flammable liquids.
- The area surrounding the experiment should be kept clear of any obstructions and away from the storage of food. It should be well lit and ventilated and close to a water supply. A solid table with a heat resistant top should be provided
- Substances in non-reclosable packaging should be used up (completely) during the course of one experiment, i.e. after opening the package.
FAQ and troubleshooting
With time, thymol blue solution absorbs carbon dioxide CO2 from air, which results in yellow coloring. Simply add 1 more drop of thymol blue into the test tube and continue with the experiment.
Perhaps, carbon dioxide escapes from the slits between the rubber stopper and the flask. Turn the rubber stopper in the flask neck while slightly pushing it down. Also, make sure that the tip is inserted all the way in. Ensure that the end of the hose is immersed in the solution.
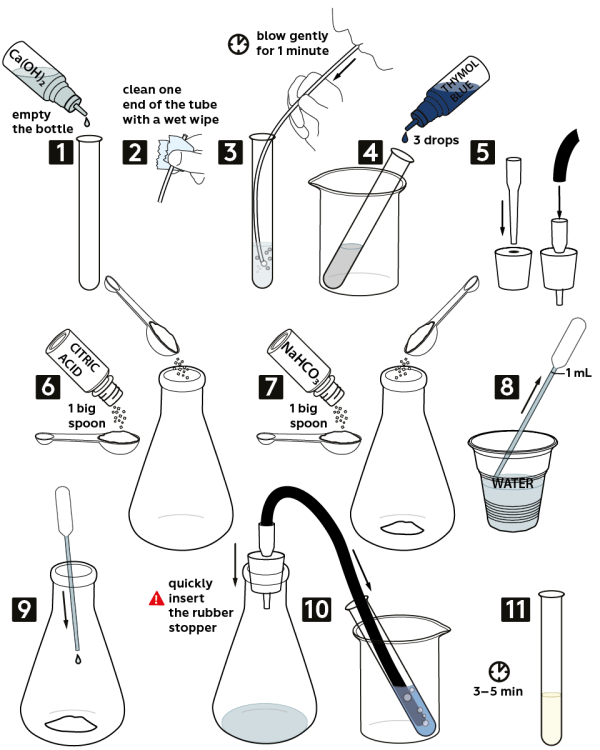
Step-by-step instructions
- Pour out saturated solution of calcium hydroxide Ca(OH)2 from the vial (3 mL) into a test tube.
- Wipe the end of a silicon tube with a wet napkin.
- Insert the tube into the test tube. Now, carefully blow air through the tube for 1 minute. The solution will turn cloudy.
- Put the test tube into the beaker. Add in there 3 drops of 0.001М thymol blue solution.
- Take a one-holed rubber stopper from the set and insert the tip of the pipette in it. Secure the black hose on the pipette, as shown.
- Measure 1 big spoon of citric acid. Pour it out into the flask.
- Measure 1 big spoon of sodium bicarbonate NaHCO3. Pour it out into the flask.
- Using a Pasteur pipette, measure 1 mL of water.
- Squeeze the water out into the flask.
- Quickly yet securely close the flask with a rubber stopper. Put the end of the hose into the solution in the test tube. Wait for 3–5 minutes.
- Solution in the test tube will change its color from blue to yellow.
Disposal
Dispose of solid waste together with household garbage. Pour solutions down the sink. Wash with an excess of water.
Scientific description
Why does the solution turn white when we blow air through it?
When a human breathes, not only does he saturate his fibers and organs with oxygen, he also gets rid of carbon dioxide CO2, which constantly accumulates in the organism. When carbon dioxide enters the solution of sodium hydroxide Ca(OH)2, the following reaction takes place:
CO2 + Ca(OH)2 → CaCO3 + H2O
As a result of this interaction, calcium carbonate CaCO3 forms. Calcium carbonate is a white substance which is hardly soluble in water. It consists of small particles of calcium carbonate, which make the solution turn white and misty.
Calcium carbonate is the main component of limescale – a hard white deposit. It often appears on the surface of heating elements after contact with hard water. Such water has a heightened content level of metal ions, especially those of magnesium Mg and calcium Ca.
So how does the limescale form? Tap water contains hydrogen carbonate HCO3-. With the increase of temperature (for example, when water boils) hydrogen carbonate turns into carbonate CO32-:
HCO3- → CO32- + H+ If the formed carbonate meets an ion of calcium Ca2+ or magnesium Mg2+, which are very well represented in hard water, a precipitate forms:
Ca2+ + CO32- → CaCO3↓
Mg2+ + CO32- → MgCO3↓
Insoluble carbonates of calcium and magnesium, this is what forms limescale. If you don’t clean your heating elements, they may even break down because of limescale.
What role does thymol blue play in this experiment?
The color of thymol blue depends on the quantity of protons H+ in a solution. If the medium is basic, there are few protons in the solution. So few, that even thymol blue itself suffers from their shortage. Such a “protonless” (or, in a scientific manner, “deprotonated”) form of thymol blue has a blue coloring. This is the form we observed in the beginning of the experiment.
Let us call thymol blue “Ind”. When it has very few protons, it is blue Ind2-. If more protons appear in the solution, thymol blue becomes yellow Hind-. In the presence of a large quantity of protons all of the thymol blue becomes red H2Ind.
Such substances as thymol blue are called pH-indicators. You can read more about it in the description of the experiment «Magic liquid»
What happens when we add water?
When we mix the citric acid with sodium hydrogen carbonate NaHCO3 and add some water, carbon dioxide CO2 forms.
Why do we synthesize carbon dioxide?
Good question, why not to blow more air through the solution, same as we did in the beginning of the experiment? Air that we breathe out contains more carbon dioxide than air that we breathe in. However, this is not enough for the next reaction in this experiment. This is why we need to produce carbon dioxide in a chemical way.
What happens in the vial?
So, we have calcium carbonate CaCO3 and thymol blue in the vial. While passing carbon dioxide CO2 through this solution, calcium hydrogen carbonate Ca(HCO3)2 forms:
CO2 + CaCO3 + H2O → Ca(HCO3)2
Calcium hydrogen carbonate Ca(HCO3)2 is well soluble in water, this is why the solution becomes transparent.
Why does the solution turn yellow at the end of the experiment?
When calcium hydrogen carbonate dissolves in water, it splits into ions, producing a calcium ion and two hydrogen carbonate ions:
Ca(HCO3)2 → Ca2+ + 2HCO3-
The hydrogen carbonate ion can also split one more time, producing a carbonate ion and a proton:
HCO3- → H+ + CO32-
This proton reacts with the thymol blue, transforming it into its yellow protonated form, this in turn causes the solution to turn yellow.


